Your vacuum cleaner works hard to keep your home looking great and smelling good. For most homeowners, vacuum cleaners are often an investment into their home. And like any investment, ensuring it gets the proper care is the best way to protect it.
There are a number of things you can do to help make sure your vacuum works as it should for many years to come. Let’s take a look at seven maintenance tips you should know to help you take care of your vacuum cleaner.
1. Replace the Bag Regularly
One of the quickest and easiest things you can do to maintain your vacuum cleaner is to replace the bag on a regular basis. Many people assume that bags only need to be replaced when they feel full. However, to keep your machine working at its best, you’ll want to replace the bag when it is about 2/3 full, not when it is completely packed with dirt. Debris needs room to enter the bag, and if there is already a large accumulation of debris inside it, there won’t be room for what the vacuum cleaner picks up and it will no longer work as efficiently as it should.
There are certain signs you can look out for that indicate a bag is full, or getting close to it. The most obvious sign is when you vacuum an area and find it covered in debris that wasn’t there before. This typically happens because the bag is full, and debris escaped and made its way back onto the carpet. Another sign is when you notice the vacuum cleaner suction isn’t as strong as it should be.
One of the main benefits of owning a bagless vacuum cleaner is that you can see precisely how much dirt and debris is trapped inside the machine. Obviously, being able to see how full the inside canister will help you avoid all of the problems listed above and help you maintain your vacuum cleaner.
2. Make Sure the Bag is Properly Attached
It sounds easy to do, but with so many different brands, models and types of vacuum cleaners out there, attaching the bag may prove to be somewhat difficult for some people. This is especially true for those doing it for the first time.
While the method of attaching a bag will differ from model to model, one thing does remain constant — you need to make sure that the opening of the bag is securely on the nozzle. If there are hooks, holders, or clips, you’ll want to firmly attach those in place as well.
If the bag isn’t properly attached, you could find that debris doesn’t enter the bag as it should, but instead fills the inside of your vacuum cleaner. This can damage the cleaner, as the moving parts won’t be able to do their job as effectively as it could. And once this happens, it is virtually impossible to get all of the dirt out of the machine.
In addition to attaching the bag, you also want to ensure that you buy the correct bags for your model. Each make of vacuum cleaner has so many different models, so you can wind up thinking you’re getting the right one when you’re not. If this happens, you may discover that the bag wasn’t as secure as you thought it could be. Check the reference number on your machine and compare it to the number on the bag to avoid purchasing one that doesn’t work.
Additionally, once you find the right bag, stock up on them. With so many new models coming out every year, you never know when the manufacturer will stop making bags for your older model vacuum cleaner.
3. Empty Bagless Models Often
Even though I briefly touched on this point above, I want to reinforce the importance of emptying the dirt and debris from a bagless vacuum as often as possible.
Many bagless machines have a marker indicating when to empty the receptacle. This is helpful, but even if the debris hasn’t reached this marker, it’s still wise to empty the receptacle anyway. I would suggest you empty it after every use. Don’t let the dirt and debris settle within the unit. And depending on the type of bagless unit you have, you may even want to rinse out the receptacle with water to ensure all of the dirt has been removed.
When you empty it, you’ll also want to clean the attached filter. You can gently knock the filter against the garbage to loosen any clinging debris, or tiny particles that may be trapped inside. Then you can take your finger, or any other object that isn’t sharp, and remove dirt from in between the slats of the filter. It’s not necessary to remove every last bit, but doing a general cleaning of the filter can help it work properly. Some filters are even washable.
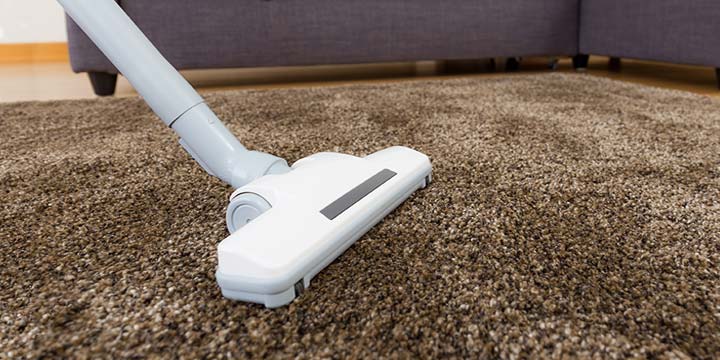
4. Clean the Brush Roll
Occasionally, you’ll want to check the brush roll of your vacuum cleaner. Over time, certain items can get wrapped around the roll that can prevent it from spinning as well as it should. These things include floss, hair, and string.
You can either remove these objects while the roll is in place, or you can remove it. I would only suggest removing the roll from the vacuum if you feel comfortable with doing so. You’ll be able to give it a deeper clean by removing it, but what’s the point of doing so if you can’t get it back on.
While it will differ from model to model, the roller of most vacuum cleaners are attached by a plate. So, you’ll first lift or remove the plate and then slide the roll out from the slots on either side. Once you’ve identified objects wrapped around the roll, you can remove them with your fingers or with scissors. Then gently pull these objects from the roll until they come completely off. You may even consider washing it off with soap and water, just to ensure that it’s as clean as possible.
Now that you have the brush roll off of the unit, you now have the unique opportunity to clean or replace the roll’s bearings, caps and inside that part of your vacuum. It may not be damaged or too dirty, but a quick wipe with a damp rag will help clean off any sort of dirt or debris that may be trapped in those areas.
5. Check the Belt
After checking the brush roll, you may want to check the belt, which keeps the roll in place. If the belt isn’t tight against the roll, it may be time to replace it. Check to see if it is stretched out, frayed or narrow. Also make sure that the belt hasn’t slid out of place or become damaged in a particular spot.
As a general rule, the belt should be replaced every six months to one year. This is not a solid number, however, as it really depends on the frequency of which you use your vacuum cleaner, not to mention the brand and model you’re using. If you don’t use your vacuum cleaner very often, let’s say once every two or three weeks, then you likely won’t need to replace the belt twice a year. However, if you use it every single day, then maybe you’ll need to replace the belt every few months.
If you do replace the belt, you can do so by removing the roll, sliding the belt off, and then sliding the new belt on. It’s easy to do, and not something that you need to take to a special technician. In fact, in the Instruction Manual that came with your vacuum cleaner, there’s probably step-by-step instructions for replacing the belt.
6. Check the Filters & Hoses
Most vacuum cleaner models, particularly newer ones, have filters attached to help pick up particles that may contaminate your indoor air quality. If your vacuum cleaner has a filter, you’ll want to clean and periodically replace it. You can rinse a plastic filter, and shake a paper or fabric one, depending on how easy it is to remove.
The importance of keeping your filter clean cannot be stressed enough. This is especially true if you own a vacuum cleaner with a HEPA filter, as that filter is designed to help improve your indoor air quality. Keeping that filter clean can play a role in how clean the air you breathe is.
Lastly, sometimes hoses get large objects trapped inside them. If you find that your hose attachment isn’t working right, a trapped object may be the culprit. You can find the object by peering into the hose or by sticking a hook inside it to see if it hits against something. Some of the most common objects to get caught inside hoses are socks, underwear or small toys.
7. Take Your Vacuum to the Shop
If you notice a problem with your vacuum cleaner and can’t determine the source of the trouble, you can always take it to a vacuum shop. These shops are generally inexpensive, and the clerk can usually fix your vacuum’s issue overnight or even the same day, depending on what the problem is.
If you’ve noticed that your vacuum just isn’t picking things up as thoroughly as it used to, the shop can replace parts for under $10, depending on what’s causing the problem and on the shop’s individual rates. Depending on how old your vacuum cleaner is, having somebody fix the problem for you may be the best route for you and your family. Oftentimes, however, it’ll just be easier to buy a new vacuum cleaner. Especially with so many models and new technologies available, such as robot vacuums.
Final Thoughts on Vacuum Cleaner Maintenance
A vacuum cleaner is a machine, and just like any other appliance in your home, proper maintenance is required to help keep it working as efficiently as it should. Because of its various working parts, it sometimes needs a little extra care and a thorough cleaning. This is easy to do when you know what it needs and how to do it.
Keeping your vacuum cleaner in good working order is easy to do and doesn’t take up very much time. Just a few minutes of maintenance work can add years to its life. Replacing a vacuum cleaner can be expensive, but taking the time to keep it working well can be relatively quick and painless when you follow the tips above.
Copyright to the original publisher learn allergy and air.
Sponsored by The econcierge Delivering the usual exceptionally. Get in touch with us at [email protected]